Design Database
Before you create any tables for your system, you should design the database. An Entity-relationship model will help you to understand the structure of your database. The ER diagram is not the intention of this article so we will use a simple ER diagram (figure 1) for this tutorial.
 (figure 1)
Create Project
Next step, you should create a project. I will use PyCharm as the IDE for this tutorial, but you can use any IDE as you like. Click the file menu, click new project, and the following dialog (figure 2) will show up. Choose the location of the environment, then click create button and wait for the project set up to finish.
 (figure 2)
Install alembic
Open up the project you have created, then open the terminal and install the alembic as follows:
/path/to/your/project/.venv/bin/pip install alembic
The above packages will be installed as well.
Initialize the environment
Open up the terminal and initialize the environment as follows:
/path/to/your/project/.venv/bin/alembic init alembic
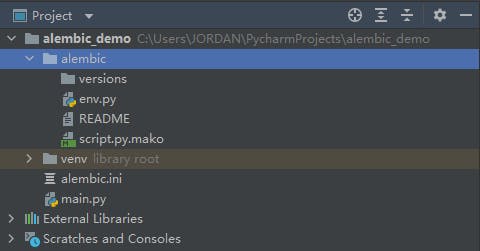
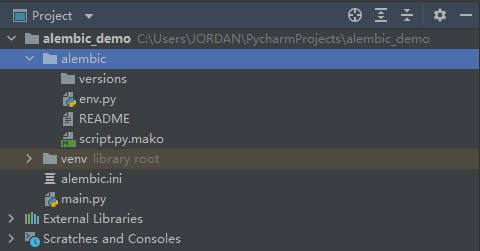
The alembic directory (figure 3) will be created.
 (figure 3)
Open up the alembic.ini file, and change the sqlalchemy.url(figure 4) to your database address.
 (figure 4)
driver: database driver
User: database username
Pass: database password
Localhost: database IP address
Port: port number
dbname: database name
In my case, the address should be:
mysql+mysqlconnector://root:admin@localhost..
Create entity class
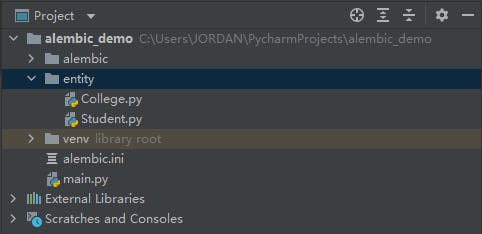
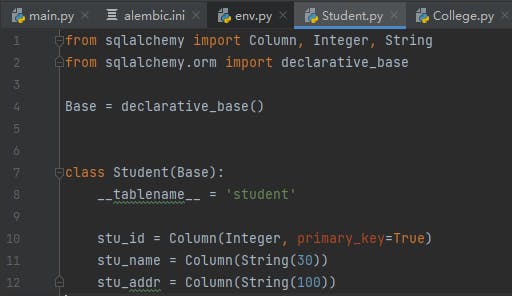
Create a new directory and create entity classes as follows.
 (figure 5)
 (figure 6)
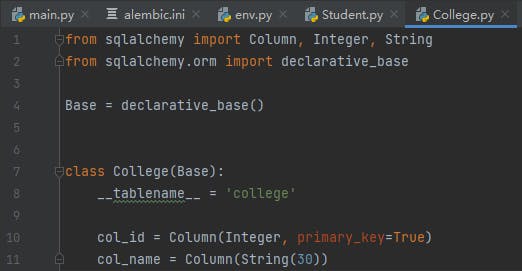 (figure 7)
Setup the env file for auto-generation
Import the entity classes you have created, and set up the target_metadata to it.
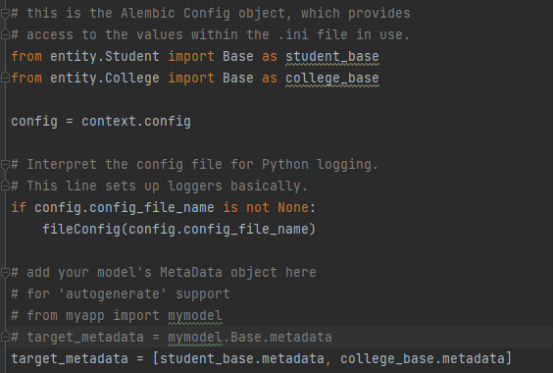 (figure 8)
Open the terminal and generate the table creation script as follows:
alembic revision -- autogenerate -m “create tables”
 (figure 9)
Now we open the generated script and check it out.
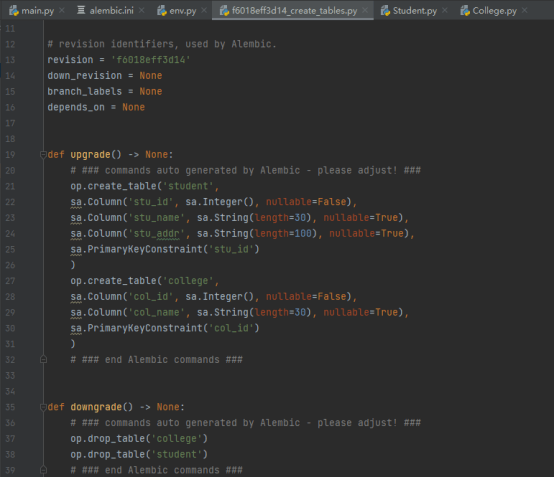 (figure 10)
Create tables by the script
The script looks fine, then we start to create the tables as follows:
alembic update head
 (figure 11)
Now, let’s check out the tables we created by database tools.
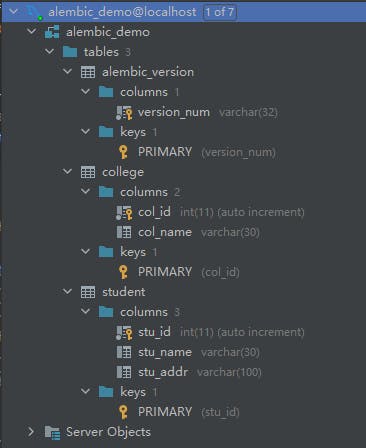 (figure 12)
Looks great!

